TL;DR: Build and test RPM packages on local virtual CentOS machines before deploying to RHEL.
We’ve recently delivered our first round of packages in a project where the customer is running Red Hat Enterprise Linux (RHEL). The default way of distributing software for RHEL and similar operating systems is by packaging it into an RPM file, and ship it.
Choosing a distribution for local development
As many other dev shops, we pretty much use Macs for workstations, with Debian on our servers, so getting into RHEL meant learning some new Linux ways, and figuring out how to practice packaging on local virtual machines (with VirtualBox and Vagrant).
First we tried installing RHEL locally on VirtualBox, and this worked fine, but we didn’t want to impose ourselves with the enterprisey licensing deals of RedHat, as we only wanted to do local development and testing, and the entire operating system is open source after all. It suffices that our customer has a RHEL support license, so if we ever run into any serious problems, we can call for help that way.
Luckily, there are several distributions which are very similar to RHEL, but come with fewer shackles (basically because they’ve removed all RedHat trademarks). The ones we considered were:
* CentOS – a functionally compatible fork of RHEL – this is the one we chose in the end because it seems identical to RHEL – just the name and some branding differs.
* Scientific Linux – also a RHEL derivative – but we couldn’t figure out why we should choose this one over CentOS. It seems it adds some features we didn’t need.
* Fedora – an upstream distribution of RHEL, or a community edition, where new features get time to mature before they are merged into RHEL. Again, we didn’t see the point of getting features which aren’t available in our target environment anyway.
So we ended up using CentOS, but we did also find a lot of documentation for Fedora that was helpful for developing RPMs. Our customer was using RHEL 6.5, so we went with CentOS 6.5 (they follow the same versioning).
Setting up a local build/test environment
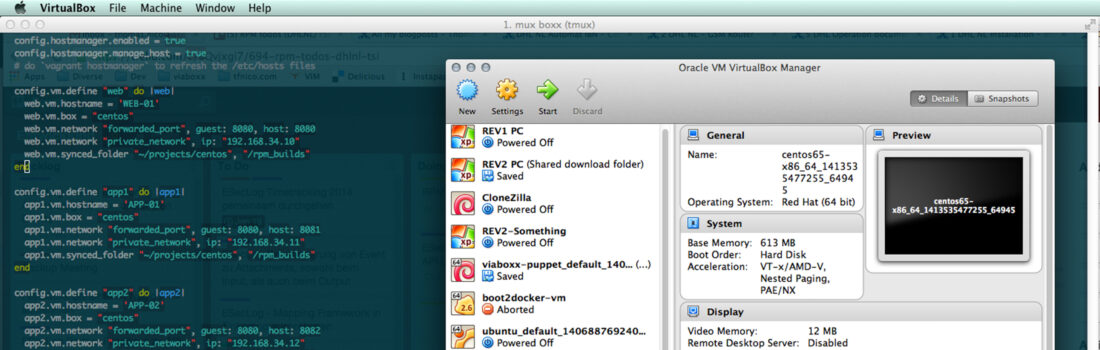
In order to build and test RPMs on our laptops, we needed to set up a production-similar set of virtual machines. We picked VirtualBox as a platform, and used Vagrant for instrumenting the machines. We’ve also used Vagrant in the past to test/develop Puppet provisioning for our Debian servers, but in this round it was a lot simpler. We just wanted the machines up and running, and have a common mount point where we could build and use the RPMs.
The target environment is, with a few simplifications, is pretty much like this:
- A database server
- Two clustered application servers
- A load balancer/web server in front of the app servers
We can have Vagrant set this up for us by creating a Vagrantfile with this multi-machine configuration:
[codesyntax lang=”ruby”]
Vagrant.configure("2") do |config|
  config.vm.box = "centos"
  config.vm.box_url = "https://github.com/2creatives/vagrant-centos/releases/download/v6.5.3/centos65-x86_64-20140116.box"

  # do vagrant plugin install vagrant-hostmanager
  config.hostmanager.enabled = true
  config.hostmanager.manage_host = true
  # do `vagrant hostmanager` to refresh the /etc/hosts files

  config.vm.define "web" do |web|
    web.vm.hostname = 'WEB-01'
    web.vm.box = "centos"
    web.vm.network "forwarded_port", guest: 8080, host: 8080
    web.vm.network "private_network", ip: "192.168.34.10"
    web.vm.synced_folder "~/projects/rpms", "/rpm_builds"
  end

  config.vm.define "app1" do |app1|
    app1.vm.hostname = 'APP-01'
    app1.vm.box = "centos"
    app1.vm.network "forwarded_port", guest: 8080, host: 8081
    app1.vm.network "private_network", ip: "192.168.34.11"
    app1.vm.synced_folder "~/projects/rpms", "/rpm_builds"
  end

  config.vm.define "app2" do |app2|
    app2.vm.hostname = 'APP-02'
    app2.vm.box = "centos"
    app2.vm.network "forwarded_port", guest: 8080, host: 8082
    app2.vm.network "private_network", ip: "192.168.34.12"
    app2.vm.synced_folder "~/projects/rpms", "/rpm_builds"
  end

  config.vm.define "db" do |db|
    db.vm.hostname = 'DB-01'
    db.vm.box = "centos"
    db.vm.network "private_network", ip: "192.168.34.13"
    db.vm.network "public_network"
    db.vm.synced_folder "~/projects/rpms", "/rpm_builds"
  end
end
[/codesyntax]
I found the starting point for this VirtualBox image on http://www.vagrantbox.es. I also toyed around with creating our own base-box from the official CentOS distribution, but in the end the ready Vagrant box came with some default network configuration and VirtualBox additions ready to use.
The linked box is a “minimal” CentOS distribution, meaning that there’s next to no packages installed on it already.
The most exotic part of our Vagrant configuration file is the hostmanager plugin. We want to use nice short hostnames for addressing the servers instead of IP-addresses, and these happen to be the same in production. This means that from the app-server, we can hardcode the DB server host to be ‘DB-01’, and it will work fine in both local dev and live servers. One can achieve this with manually editing /etc/hosts on every system, but it’s much easier to enable the hostmanager plugin. It will update the /etc/hosts file on each virtual server, and on the host-system (the Mac).
Also note that with a multi-vm Vagrantfile like this, we can refer to each vm by its shorthand name, or leave it out to operate on all vms:
vagrant up # brings up all four machines
vagrant ssh app2 # ssh to the 2nd app server
vagrant reload db # reload vagrant configuration for db server
Also note that I mount the same folder in all machines: ~/projects/rpms – this is where I’ve got all our RPM-sources checked out (each RPM is one Git repository, for example ActiveMQ).
Making our CentOS machines similar to the target servers
Being based on some vagrant box already introduces some difference from the production servers, but beyond that we wanted to keep difference in installed packages to a minimum.
Normally, if you’re starting off with a minimal CentOS, you probably want to install the “Base” package group like this:
yum groupinstall "Base"
The above command will install around 150 packages including stuff like perl, cron, sudo, wget, man pages and more.
In our case, we decided to avoid the base package, and imitate our target environment tinstead. I first exported a list of packges from the respective target server:
rpm -qa > rpm-list.txt
.. then transferred the rpm-list.txt to the local virtual machine:
sudo yum -y install $(cat rpm-list.txt)
The RPM building machine
Having set up the runtime environment above, I prefer using a distinct RPM-builder machine, configured in a separate Vagrantfile in another folder:
[codesyntax lang=”ruby”]
Vagrant.configure(VAGRANTFILE_API_VERSION) do |config|
  config.vm.box = "centos"
  config.vm.network "private_network", ip: "192.168.33.10"
  config.vm.network "public_network"
  config.vm.synced_folder "~/projects/rpms", "/rpm_builds"
end
[/codesyntax]
This is just a simple machine that also mounts the RPM folder. I use this machine for building the RPMs themselves (we also have a machine like this set up in Jenkins for building the RPMs automatically, but that’s a topic for another blog-post).
The traditional way of building an RPM is to invoke rpmbuild and build the binary. But it’s consider a somewhat cleaner approach to use Mock, which contains the build dependencies within chroots (sort of like isolated filesystems).
In order to prepare for using Mock on a server, some tools have to be installed first:
# as root:
wget http://fedora.mirrors.pair.com/epel/6/x86_64/epel-release-6-8.noarch.rpm
rpm -Uivh epel-release-6-8.noarch.rpm
yum install fedora-packager
usermod -a -G mock vagrant # add user vagrant to group mock
ln -s /etc/mock/default.cfg /etc/mock/db.cfg #some different environments
ln -s /etc/mock/default.cfg /etc/mock/app.cfg #some different environments
ln -s /etc/mock/default.cfg /etc/mock/web.cfg #some different environments
Here’s an example, building our activemq package:
cd ~projects/build-server #here's the Vagrantfile for the build machine:
vagrant ssh # ssh into the build machine
cd /rpm_builds/rpm-activemq

#clean up after previous builds:
rm -rf target
rm -rf SRPMS/*

#build new RPM into the relative 'target' directory
rpmbuild --define '_topdir '`pwd` -bs SPECS/activemq.spec
mock -r app --init
mock -r app --no-clean --resultdir=target SRPMS/*.src.rpm
Once the build is done, the RPM binary can be accessed from the target server (via the common mount):
cd ~/projects/target-environment #this is where I have run the Vagrantfile
vagrant ssh app1 # ssh into the first app server
sudo -i #become root
rpm -U /rpm_builds/rpm-activemq/target/activemq-5.9.1.noarch.rpm
And with that we have completed a roundtrip of building and installing an RPM!
RPM – a quick guide
rpm is a very powerful utility, not only for installing packages but also for inspecting and provisioning them. There are plenty of resources dedicated to RPM online, but I’ll include our quick-guide here, as I kept coming back to it for our most used RPM-commands:
[table td1="command" td2="What" td3="Example"]
[td1] file <rpmfile> [/td1] [td2] See name, version, arch, build number, etc of an rpm file (usually part of the rpm file name as well) [/td2] [td3] > file activemq.rpm
activemq-5.9.1-1.el6.noarch.rpm: RPM v3.0 bin i386/x86_64 activemq-5.9.1-1.el6
[/td3]
[td1] rpm -U <rpmfile> [/td1] [td2] Install/update package [/td2] [td3] [/td3]
[td1] --prefix [/td1] [td2] Install in alternative location (requires relocatable package, see below) [/td2] [td3] [/td3]
[td1] --root [/td1] [td2] For installing into a chroot environment (see below) [/td2] [td3] [/td3]
[td1] --nodeps [/td1] [td2] Ignore dependencies when installing (anti pattern, but useful if you just want to quickly a crappy package to test something) [/td2] [td3] [/td3]
[td1] --nosignature [/td1] [td2] Ignore checking signatures (anti pattern, but maybe useful if installing from our own custom repos) [/td2] [td3] [/td3]
[td1] -v [/td1] [td2] Verbose (works on lots of commands) [/td2] [td3] [/td3]
[td1] rpm -e <packagename> [/td1] [td2] Erase package [/td2] [td3] [/td3]
[td1] rpm -qi <packagename> [/td1] [td2] Package info (note that packagename is not always = rpm filename). A name like activemq-5.9.1-1.el6.noarch can also be referenced as activemq-5.9.1 or activemq (leave suffixes out) [/td2] [td3] [/td3]
[td1] rpm -pi <rpmfile> [/td1] [td2] Run query on an rpm file instead of packagename [/td2] [td3] > rpm -ip activemq-5.9.1-1.el6.noarch.rpm
package activemq-5.9.1-1.el6.noarch is already installed [/td3]
[td1] rpm -qa [/td1] [td2] List all installed packages (handy with grep). Add --last to get them ordered by install (newest on top). [/td2] [td3] > rpm -qa --last | less [/td3]
[td1] rpm -q --changelog <packagename> [/td1] [td2] Show changelog for package [/td2] [td3] [/td3]
[td1] rpm -qc <packagename> [/td1] [td2] Show config files [/td2] [td3] [/td3]
[td1] rpm -ql <packagename> [/td1] [td2] List all files [/td2] [td3] [/td3]
[td1] rpm -qs <packagename> [/td1] [td2] List state of package files [/td2] [td3] [/td3]
[td1] rpm -ql --dump <packagename> [/td1] [td2] Show all information about files [/td2] [td3] [/td3]
[td1] rpm -q --scripts <packagename> [/td1] [td2] Show scripts (%post, %pre, and so on) for a package [/td2] [td3] > rpm -q --scripts gnutls
postinstall program: /sbin/ldconfig
postuninstall program: /sbin/ldconfig
[/td3]
[td1] rpm -qR <packagename> [/td1] [td2] Show dependencies (requires) [/td2] [td3] > rpm -q -R activemq [/td3]
[td1] rpm -q --provides <packagename> [/td1] [td2] Show what capabilities package provides [/td2] [td3] [/td3]
[td1] rpm -q --whatprovides <capability> [/td1] [td2] Find which rpm provides some library or thingie. Useful when you want to know what packages can be installed to satisfy dependencies. [/td2] [td3] > rpm -q --whatprovides "libssl.so.10(libssl.so.10)(64bit)"
openssl-1.0.1e-16.el6_5.4.x86_64 [/td3]
[td1] rpm -q --whatrequires <capability> [/td1] [td2] Find which rpms uses a capability, file or package. Note that it only checks direct uses of a package. If you want a "full" report of uses of all capabilities and indirect use, use "yum remove package" and select no when prompted. [/td2] [td3] [/td3]
[td1] rpm -V <packagename> [/td1] [td2] Show any changes (manually) made to the files from a package after installing [/td2] [td3] > rpm -V activemq
S.5....T. c /etc/activemq/activemq.xml
[/td3]
[td1] rpm -qf <filename> [/td1] [td2] What package installed some file [/td2] [td3] [/td3]
[td1] rpm -qa --queryformat '%instprefixes}\n' [/td1] [td2] With what --prefix was a package installed [/td2] [td3] > rpm -qa --queryformat '%{name}-%{version} %{instprefixes}\n' jdk
jdk-1.6.0_45 /var/dhlnl/java
[/td3]
[td1] rpm --querytags [/td1] [td2] Shows all tags that can be used for -queryformat [/td2] [td3] [/td3]
[/table]
For more information, have a look at man rpm or look across the chapter http://www.rpm.org/max-rpm/p111.html
Working inside chroot (jails)
We did research how to operate within chroots, and although it was a very interesting approach to deploying our packages, the customer didn’t go for it in the end. I still use it some times when I want to try out something without setting up a new CentOS virtual machine:
For example, say I want to try out installing out httpd in a chroot (source/inspiration):
CHROOT=/var/chroots/httpd
mkdir -p $CHROOT/var/lib/rpm
rpm --rebuilddb --root=$CHROOT
wget http://ftp.hosteurope.de/mirror/centos.org/6.5/os/x86_64/Packages/centos-release-6-5.el6.centos.11.1.x86_64.rpm
rpm -i --root=$CHROOT --nodeps centos-release-6-5.el6.centos.11.1.x86_64.rpm
yum --installroot=$CHROOT update
yum --installroot=$CHROOT install -y rpm-build yum
cp $CHROOT/etc/skel/.??* $CHROOT/root
#for dns:
cp /etc/resolv.conf $CHROOT/etc/resolv.conf

#optional: for access to proc and dev:
mount --bind /proc $CHROOT/proc # obligatory for running java (allocating heap fails if not mounted)
mount --bind /dev $CHROOT/dev # used by apache/ssl

#enter shell using bash:
chroot $CHROOT /bin/bash -l

#If the some process cannot write to /dev/null, it could be that permissions are messed up. As root:
rm /dev/null
mknod -m 0666 /dev/null c 1 3
#(via http://itsmyxprience.blogspot.de/2009/04/devnull-permission-denied-error.html)
Summary and Resources
This guide barely scratches the surface of working with RHEL/CentOS andRPMs. There’s still a lot to be said or written about yum, repositories, RPM specs, versioning and best practices, but I think this is enough for one blog-post. For those who want to learn more, here are some starting points:
- Maximum RPM, the bible on writing RPMs
- CentOS Wiki:
- Fedora Wiki:
- Explanation of Fedora vs RedHat vs CentOS